In a previous blogpost I wrote about the announcement from Citrix regarding the Citrix Access Gateway Product Line Simplification. At the same time I just finished building a Proof of Concept for a customer of one of our consultancy partners that included the (soon to be End of Sales) Access Gateway VPX. So I quickly informed our partner of the announcement and we decided to implement the new AGEE VPX into the production environment for the customer.
Of course I was very excited to be working with the new appliance and become more familiar with the NetScaler productline, as the AGEE VPX shares the same code as the NetScalers do.
I did have the chance to get some hands on practice with the NetScaler during one of the attended Hands-on labs at Citrix Synergy, so I felt brave enough to take on this new challenge.
… And a challenge it would prove to be …
… so let me share my novice experiences with you on the new NetScaler Access Gateway Enterprise Edition VPX …
Installing the AGEE VPX on the Hypervisor
For two weeks I had the chance to install the AGEE VPX on the ESX Hypervisor for the production environment and at the samen time on the XenServer Hypervisor as well in my homelab. Installation instructions on downloading and installing the Access Gateway Virtual Appliances can be found at these Citrix edocs.
Basic config on the console
On first boot of the virtual appliance, it will automatically log on and prompt you to configure some basis IPv4 settings as shown below:
Enter netScaler's IPv4 address []: [ipv4-address]
Enter Netmask []: [ipv4-netmask]
Enter Gateway IPv4 address []: [ipv4-gateway]
-----------------------------------------------------------------
Netscaler Virtual Appliance Initial Network Address Configuration.
This menu allows you to set and modify the initial IPv4 network addresses.
The current value is displayed in brackets ([]).
Selecting the listed number allows the address to be changed.

After the network changes are saved, you may either login as nsroot and use the Netscaler command line interface, or use a web browser to
http://[ipv4-address] to complete or change the Netscaler configuration.
----------------------------------------------------------------
     1. NetScaler's IPv4 address [[ipv4-address]]
     2. Netmask [[ipv4-netmask]]
     3. Gateway IPv4 address [[ipv4-gateway]]
     4. Save and quit
Select item (1-4) [4]:_
The following variables were entered:
- ipv4-address: The NetScaler IP address, based upon IPv4.
- ipv4-netmask: The subnet mask to be used with the entered IPv4 address.
- ipv4-gateway: The default gateway to be used with the entered IPv4 address.
And after answering the first questions and thus setting up the basics, it was time to explore the web-based admin console
Advanced config through the web-based admin console
You can find the administrative web console at http://[ipv4-address] (no HTTPS!), where you need to provide an User Name and Password to login.
The default username for the NetScaler/AGEE VPX is nsroot, with password nsroot. Just in case you didn’t know.
Setup wizard
After you first log on to the AGEE VPX, you are presented with a lot of features and yellow and red circled exclamation marks. Just ignore those for now, as we are seeing all the features the NetScaler has to offer and a lot of those features will vanish after we have installed the license file.
Starting the setup wizard
| screendump | explanation |
|---|---|
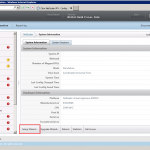
| Click System in the menu on the left. Click [Setup Wizard…] at the bottom of the right pane beneath the System information. |
|
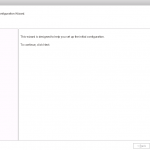
| Setup = Introduction Click [Next] |
|
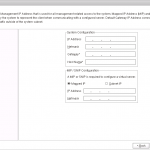
| Setup = Network Config Most likely the IP-address information provided in the previous (commandline) configuration is already entered. This is the NetScaler IPv4 System Configuration. Make sure you enter the same Host Name as the one used on MyCitrix.com when you activated and downloaded your license file. The (case sensitive) Host Name entered on the NetScaler and the one in the license file need to match to license your AGEE properly. Don’t enter any values in the MIP/SNIP Configuration for now. Click [Next] |
A NetScaler uses different types of IP’s, that each have a slightly different function:
- The NetScaler IP (NSIP) is the IP-address used to manage the appliance.
- The Mapped IP (MIP) is the IP-address used for server-side communications.
- The Subnet IP (SNIP) is the IP-address used for connections and monitoring, especially when multiple subnets are involved.
- The virtual IP (VIP) is the IP-address used for rerouting external requests to internal servers, like the ICA proxy functionality ensures requests made to a specified IP-address are routed to the StoreFront server or Web Interface.
| screendump | explanation |
|---|---|
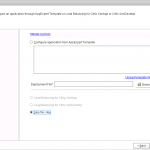
| Setup = Choose Application Just select “Skip this step” and click [Next]. |
|
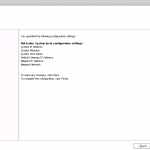
| Setup = Summary Check the settings and click [Finish]. After the configuration is set, you are presented with some additional Advanced Sonfiguration options. |
|
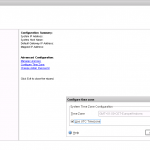
| Setup = Configure Time Zone You can choose to set the Time Zone for your appliance by clicking the link to the settings. Click [OK] after selecting the proper time zone and then click [Close] to return to the previous screen. |
|
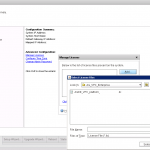
| Setup = Manage Licenses You can upload the required license file to your appliance when you click the Manage licenses link. You can check Citrix edocs for licensing instructions. |
|
| Reboot? After you have applied the new license file a popup will be shown, notifying you the AGEE needs to be rebooted to load the license file. You can choose whether you want to save your configuration and/or want to perform a warm reboot. |
In case you run into problems with your license file or detect some problems with your hostname, check out CTX130146 for shell instructions to check the registered hostname of the NetScaler and how to edit it when needed.
I for one was very happy with the instructions as I had messed up my hostname and found multiple entries in the rc.conf file that prevented the license file from being applied.
Access Gateway Setup wizard
After the NetScaler is reboot and you reentered your credentials, you are automatically presented with the Access Gateway setup wizard to help you with the configuration of your Access Gateway 10.
Get Started
| screendump | explanation |
|---|---|
| AG Setup = Welcome Click [Get Started] to start the Access Gateway Setup Wizard. |
|
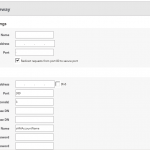
| AG Setup = Config part 1 Fill out the Access Gateway Settings:
Fill out the LDAP Authentication settings:
Scroll further down to configure the other settings. |
|
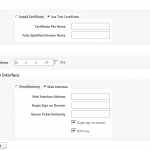
| AG Setup = Config part 2 Fill out the Certificate settings:
Fill out the DNS settings: Fill out the CloudGateway settings:
|
|
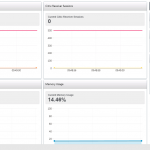
| AG Dashboard After the setup is saved, you are redirected to the Access Gateway Dashboard, where different metrics are shown. |
Unfortunately there is more to configure to get the remote access up and running after these two setup wizards. The next part of this blog series will look into the additional settings I configured to get the remote access in my homelab up and running. So stay tuned for part 2.
This post is part of a serie of multiple posts to fully cover the configuration of the AGEE VPX:
Out with the old, in with … AGEE VPX (part 1)
Out with the old, in with … AGEE VPX (part 2)
Out with the old, in with … AGEE VPX (part 3)
The following sources have been used to create this post:
NetScaler : Configuring Access Gateway for Storefront 1.1 by Chris Bradford
CTX121062 – How to License NetScaler Appliances Using the Manage Licenses Tool on MyCitrix.com
JasonSamuel.com – How to tell what license and edition you have applied to a Netscaler VPX appliance
CTX114146 – How to Install an Intermediate Certificate on Access Gateway Enterprise Edition Appliance
Citrix Access Gateway Product Line Simplification
CTX130146 – How to Change the Hostname of a NetScaler Appliance
NSIP, MIP, SNIP, VIP explanation
Citrix Blog – NetScaler for the XenDesktop\XenApp Dummy
TheGenerationV – NetScaler 1 or 2 arm mode
Youtube video – Active Directory Base DN
Citrix Blogs: Access Gateway Licensing Demystified
Pingback: Out with the old, in with … AGEE VPX (part 2) « virtuEs.IT
Pingback: Out with the old, in with … AGEE VPX (part 3) « virtuEs.IT
Pingback: Changing the NetScaler Access Gateway theme « virtuEs.IT