The only NAS experience I’ve had so far has been with a Linksys NAS, providing nothing more than SMB protocol fileshares. The SMB fileshare protocol makes the Linksys sufficient enough for file sharing in a home network but definately not a NAS device suitable for a Virtualization environment.
Obviously I needed more Storage protocol options, like NFS and iSCSI to run some real simulations. And even though I’ve read about different Virtual Storage solutions, like the Celerra VSA, I still wanted to buy new NAS hardware. Hence I decided to buy the Iomega x2-200d StorCenter, which provides iSCSI and NFS protocols as well as the (traditional) CIFS. And along with a fair price and official XenServer and VMware certified status it makes up for a great homelab NAS.
Eager to try out the many options, I started to play with the StorCenter, without setting up my entire network first (no VLANs configured so far). First up was a try-out of the NFS and iSCSI options the StorCenter has to offer.
Setting up NFS Shares on the Iomega StorCenter.
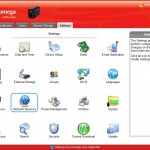
In order to configure a NFS share on the StorCenter you first have to activate the NFS options for the Iomega StorCenter:
| Screens |
Actions |
 Settings tab |
- Open the webbased admin site for the StorCenter.
- Log in as admin.
- Click on the Settings tab
|
 Network Services |
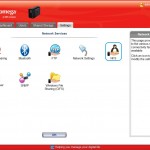
- Click on the Network Services icon
- Click on the NFS icon to set up NFS
|
 NFS Settings |
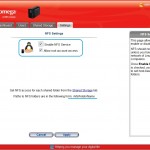
- Select Enable NFS Service
- Select Allow root account access
- Click Apply
|
After enabling NFS, you can set up the NFS Share for the Iomega StorCenter:
| Screens |
Actions |
 NFS Share Setup |
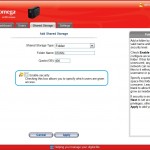
- Click on the Shared Storage tab.
- Click on the Add Storage button.
- Select Folder for the Shared Storage Type.
- Enter a name for the Folder Name.
- Enter a value for the Quota (GB).
- Make sure Enable Security is unselected.
- Click on the Apply button.
|
Connecting to the NFS Share from XenServer.
To test the NFS Share settings, I’ve set up a connection to the share with XenCenter, creating an NFS VHD share for the XenServer:
| Screens |
Actions |
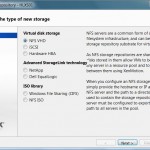 XenCenter NFS Storage |
- Start XenCenter and connect to the XenServer.
- Select the XenServer in the left pane and click on New Storage.
- Select Folder for the Shared Storage Type.
- Select NFS VHD and click Next.
|
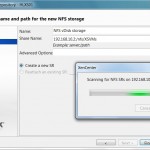 XenCenter NFS Storage (2) |
- Enter a name for the New Storage.
- Enter the server (ip-address) and path (nfs/XSVMs) for the NFS Share..
- Click Scan to whether the XenServer can connect to the NFS Share.
- (the connection to the NFS share is successful if no errors are shown)
|
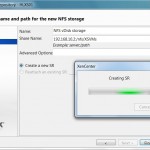 XenCenter NFS Storage (3) |
- Click on Finish to create a new SR on the NFS Share.
- (after the SR is created you can see the NFS Share for the XenServer appear in the left pane under the XenServer).
|
N.B. The next blog will show the setup for the iSCSI Drive.

Esther has been working in different roles and functions as an IT consultant ever since she finished her Masters degree in Computer Science in 1997. She has worked as a web developer, database administrator, and server administrator until she discovered how Server-Based Computing ( SBC ) combined servers, desktops, and user experience in one solution. Esther has been specializing in virtualization solutions such as SBC, VDI, application, and server virtualization for over eight years now and is currently working as a Senior Consultant at PepperByte, where she designs and implements Citrix® solutions for both small-business and large-enterprise infrastructures scaling from 100 to 15,000 users.
In january 2014 her first book Citrix XenApp 6.5 Expert Cookbook was published by Packt Publishing.
Esther is awarded as a Citrix Technology Professional (CTP) from 2015 - 2017.
Esther is awarded as a Microsoft Most Valuable Professional (MVP) in 2017.
Esther is a Citrix Certified Expert – Virtualization (CCE-V), Citrix Certified Professional – Mobility (CCP-M), Citrix Certified Professional – Networking (CCP-N) and RES Software Certified Professional (RCP).


Pingback: VirtuEs.IT
Pingback: Esther