I’m usually blogging about Citrix and/or RES Software products and my experiences implementing and designing SBC and VDI solutions with those products. This blog will however deal with a different tool … one that I use alot during the design phase of projects to ensure all parties are talking about the same components and their inter relationships, whether they have a technical background or not. A (simplified) picture still is more powerfull than 1000 words.
In order to create a sort of design poster to start the discussion with all parties involved I am a big fan of Microsoft Visio, which still does not have a good Open Source alternative to combine multiple views into one drawing. And with views I mean the option to show different components, other connections of special shape groups with just a couple of clicks by unleashing the power of layers
So let me explain the way I’m using different layers within one Visio drawing to provide specialized views to different parties within a project in this blog
Discovering layers
I discovered Visio layers during a presentation of a colleague that used it to group different shapes in a very complex Visio drawing to offer specialized views to different administrators of the infrastructure of a large organization. Layers were used to be able to only show some parts and shapes of the complete infrastructure, making it easier for Database administrators to concentrate on the databases used and the different systems that connected to them, while firewall administrators were more interested in the communication ports used between different subnets and domains.
So now that you find yourself thinking about your own examples to great different views on the same information pool, it’s time to explain in more details how you can use those layers in Visio to your advantage
Managing layers
In order to toggle different views by switching the visibility of each layer, you first need to create multiple layers for your drawing.
| Screens | Actions |
|---|---|
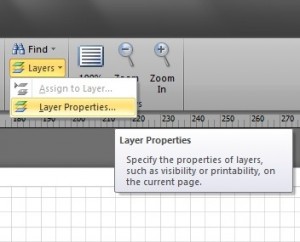
| You can manage your layers from the Home tab of the ribbon, by clicking on the layers button and selecting properties. This will open a popup window with all the layer information of the drawing. | |
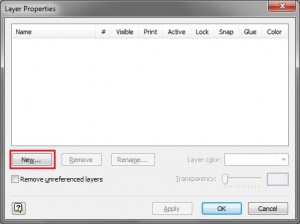
| Just click on the new button to create a new layer. | |
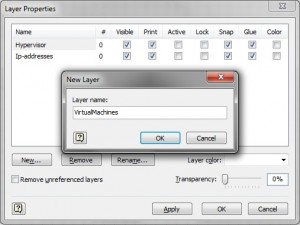
| Just fill in a name and click the Add button to add the layer to the Visio drawing. And click the OK button to close the layer properties of the drawing. |
Assigning shapes to layers
After you have created your layers, you can start by assigning your shapes to the different layers of your drawing.
| Screens | Actions |
|---|---|
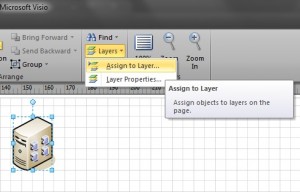
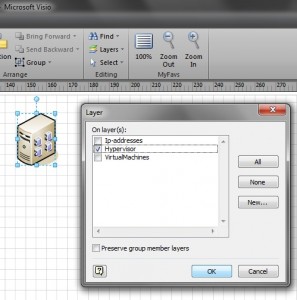
| Select the shape(s) that you want to assign to a layer. Click on the layers button on the Ribbon and select Assign to Layer to open the popup window. | |
| Select layer that you want to assign the shape(s) to. |
Toggle the visibility of your shapes
With the layers created and the shapes assigned it is time to test our different views by toggling the visibility of the layers.
| Screens | Actions |
|---|---|
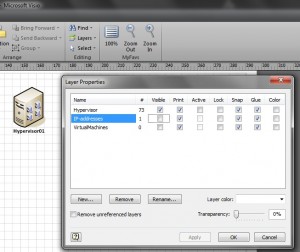
| Return to the properties of the layers to toggle the visibility of a layer off to hide the shapes that were assigned to the layer. | |
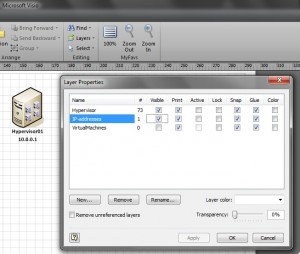
| Toggle the visibility of a layer on to show the shapes that were assigned to the layer. |
Stick around for part 2 to discover a friendly way to toggle layers and views as part 2 will provide you with the required VBA code to create a user friendly form to quickly toggle between different layers.
More goodies to come!
This post is part of a serie of 3 posts to fully cover the Use of Visio layers to create custom views:
Using Visio layers to create custom views (part 1)
Using Visio layers to create custom views (part 2)
Using Visio layers to create custom views (part 3)
Pingback: virtuEs.IT
Pingback: Chris Calaf
Pingback: Microsoft Visio
Pingback: Barry Schiffer
Pingback: Bob Stolzberg
Great howto, looking forward to part 2! =8-)
Pingback: Using Visio layers to create custom views (part 2) « virtuEs.IT
Pingback: Using Visio layers to create custom views (part 3) « virtuEs.IT